Light Your Video
Video Implementation (Shooting)—Step 3 of 9
Good lighting will make your video more interesting to your audience.
Lighting Categories
Types of Lighting
There are two types of lighting:
Direct Lighting
Bright light, like being outside on a sunny day. Direct light makes your subject visible, but also creates dark shadows that may need fixing.
Indirect Lighting
Diffused light, like being outside on a cloudy day or the lighting in your office. Indirect lighting illuminates the area around your subject, but may not be strong enough to light your subject.

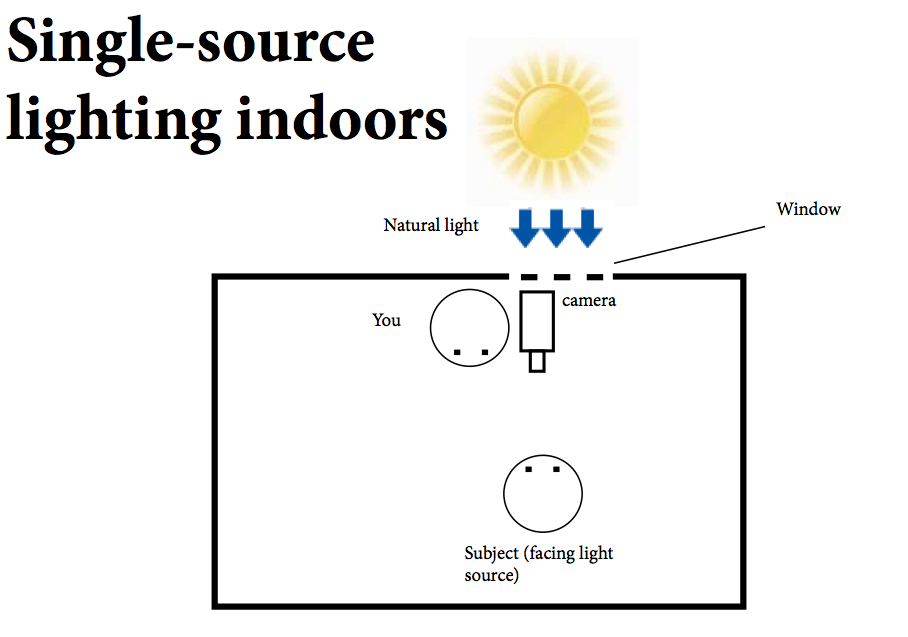
Single–Source Lighting
If you don’t have lighting equipment, the sun on a sunny day is the best single-source lighting. See the diagram below:
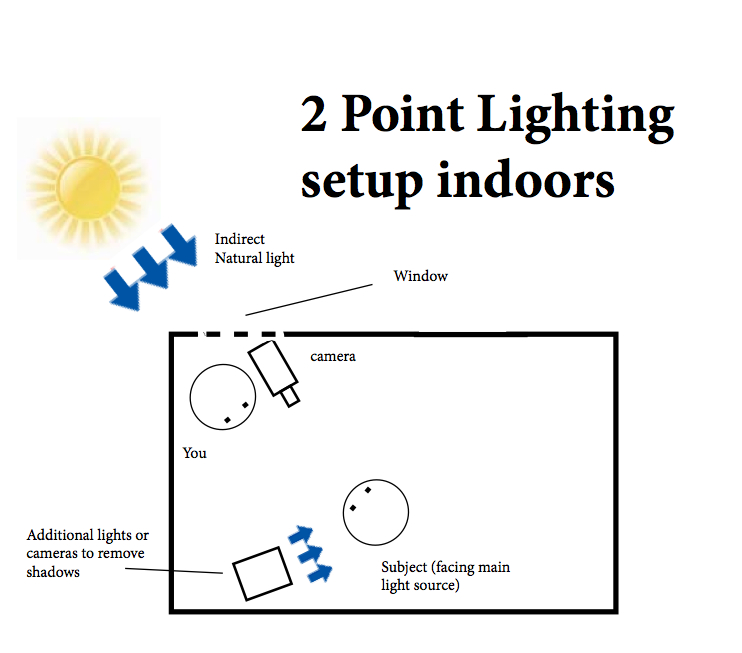
Two–Point Lighting Setup
You can use one light and the sun to brighten your subject’s face and remove shadows.

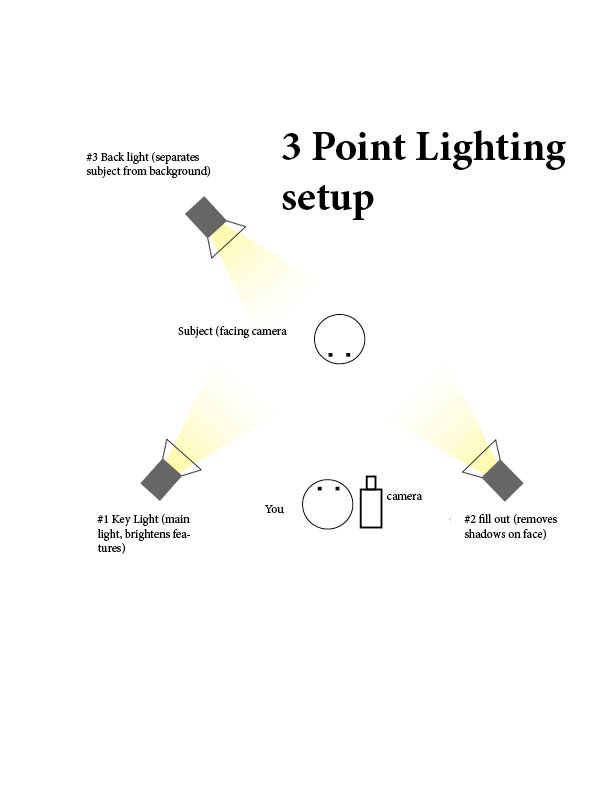
Three–Point Lighting Setup
Professionals use a three–point lighting system:
- Key Light—This is your main source of light (if shooting outside your key light is the sun).
- Fill Light—This light will light the shadows or dark spaces if your key light leaves a part of your subject dark.
- Back Light—This light behind your subject provides separation between your subject and the background. If you over-light it will create a silhouette effect—a very bright light in the background while your subject’s features are dark and covered with shadow.
Lighting Tips
- When outdoors, shoot either early in the morning or late in the afternoon. Noon light will create harsh shadows on your subject.
- Never film someone with their back to the sun—you won’t be able to see them through the shadows.
- Never use sunlight through venetian blinds—you’ll be able to see the shadow bars on your subject’s face.
- Use reflectors (mirrored or reflective sheets) to bounce light to an area that needs brightening, such as the side of someone’s face. Cheap reflectors include: poster boards, easels or even car sun reflectors.
- Avoid overly bright or dark spaces.
- Be sure to use the “white balance” feature to get the best results from your available light and to create realistic skin tones. There should be white balance information in your camera's manual.
- White backgrounds are the easiest for lighting.

Resources
- Lighting for Video–Basic Lighting Tips
- Lighting Tips for Video Production
- Cheap Video Lighting Solutions
Next Step
Go to our Video Implementation (Shooting) step 4: Film Your Video.
Content Lead:
Jonathan Rubin
Page Reviewed/Updated: May 4, 2012
Toolbox


Step By Step
Review all the video implementation (shooting) steps:
- Capture Audio for Your Video
- Compose Your Video Shots
- Light Your Video
- Film Your Video
- Shoot Video Stock Footage
- Conduct a Video Interview
- Learn About Video Copyright
- Find Free Video Stock Footage
- Video Production Checklist
WHAT'S NEXT?